Tutorial Series Blueprint: From First Prompt to Final Export
Ever wondered how top creators keep their work so high-quality? It’s often because they use a structured approach to making things. By learning a professional pipeline, you can turn simple ideas into amazing digital assets easily.
This guide is your complete roadmap for the pokimane ai tutorial series. We’ll take you through the whole production process. It starts with your first idea and ends with your final work.
By following this tutorial series, you can use modern tools to make your work better. You’ll learn the technical skills needed for a top-notch production system. Consistency and quality are within your reach with these steps.
Key Takeaways
- Master the full lifecycle of digital asset production.
- Learn to bridge the gap between initial prompts and final exports.
- Implement professional standards to improve your creative output.
- Understand the technical foundations of modern generative pipelines.
- Streamline your workflow to save time and increase efficiency.
Setting the Stage for Your AI Workflow
Starting a successful AI project takes more than just hitting the generate button. You need a clear plan to make sure your vision comes to life. Organizing your workflow early helps you avoid common problems that can stop digital projects in their tracks.
Defining Your Creative Goals
Setting a clear goal is the first step in any AI project. It’s like using the Agent Architect tool to pick your goals, data, and behaviors quickly. You should be just as precise with your goals.
Think about what you want to achieve before starting. Do you want to create a consistent character or explore new visual styles? Being clear here helps keep your project on track and prevents it from getting too big.
Preparing Your Hardware and Software Environment
After setting your goals, check if your setup can handle the technical needs. You might run models on your computer or use the cloud. Your setup must be strong enough for the work ahead.
Getting ready right now avoids technical issues later. If you’re working on your computer, make sure your GPU can handle big images. For cloud options, check if your platform supports your project’s software needs.
Spending time on setup saves you from future headaches. A solid base lets you dive into the creative parts without worrying about tech problems.
Understanding the Pokimane AI Tutorial Series Framework
Using a pokimane ai tutorial series can boost your creativity. It uses a modular design, letting you change tools as needed. This way, you can tackle big tasks in smaller parts, keeping your style consistent while trying new things.
This tutorial series is all about flexibility. You don’t have to stick to one software. Instead, you build a system that fits your unique style. This keeps your work fresh and ready for the fast-changing digital world.
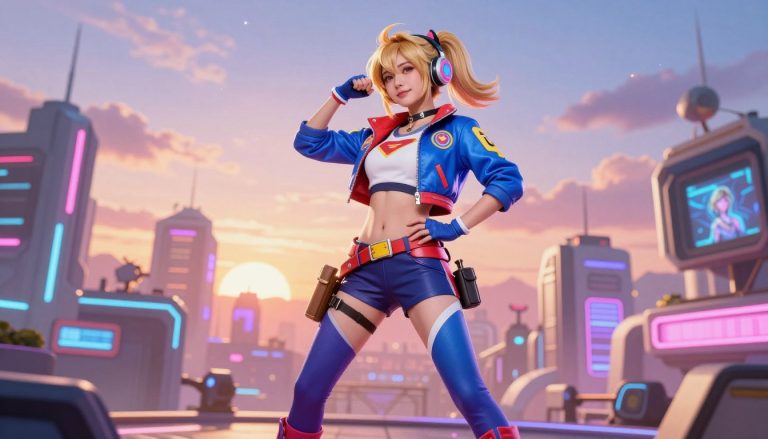
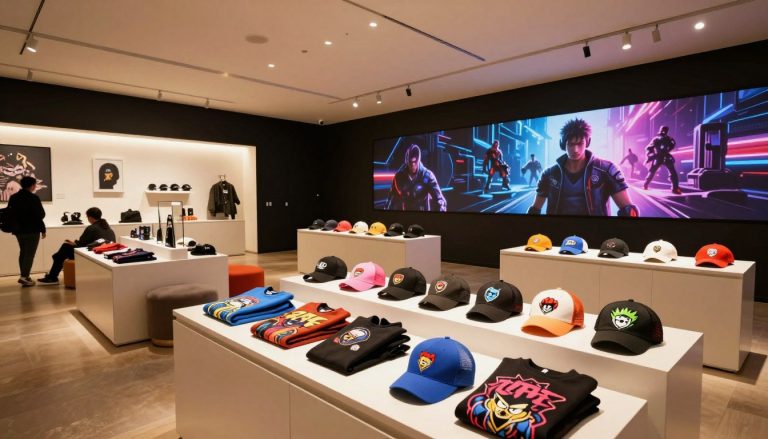
Analyzing the Streamer-Inspired Aesthetic
The streamer look is known for bright colors and a clean, inviting feel. To get this look, focus on good lighting and character designs that connect with your viewers. Visual cohesion is key when creating your assets.
Look at the framing and negative space in this aesthetic. These elements make your work feel both personal and professional. Consistency in these areas is what makes your work stand out.
Deconstructing the AI-Assisted Production Pipeline
Building a strong production pipeline means understanding how AI tools work together. This process involves several steps that turn simple ideas into finished media. Think of it as a modular assembly line for your digital projects.
Here are the main stages for setting up your workflow:
- Concept Generation: Use text-to-image models to set the visual direction.
- Asset Refinement: Use inpainting and upscaling for high-quality visuals.
- Audio Integration: Add AI-generated voiceovers to your animations for a smooth experience.
By following this pokimane ai tutorial series, you can fix issues without starting over. This flexibility is crucial for growing your creative output efficiently. Remember, every tutorial series is a guide, but your unique touch makes your work special.
Mastering the Art of Prompt Engineering
The secret to making AI work well is knowing how to talk to it. Prompt engineering is a key skill for using AI for creative tasks. By treating your inputs as a precise language, you control the output.
Crafting Effective Text-to-Image Prompts
To get professional results, you need to do more than just describe. Tools like Prompt Studio help you refine your prompts. This iterative process is crucial for getting the exact look you want.

Begin by clearly stating your subject, style, and lighting. Experimenting with different words helps you see how the model works. This method keeps your AI images predictable and high-quality throughout your project.
Refining Prompts for Consistent Character Models
Keeping characters consistent is a big challenge in AI projects. Create a base prompt with your character’s key traits, clothes, and unique features. This keeps your character’s look consistent across scenes.
Getting consistent takes patience and fine-tuning. If a character looks off in a new image, tweak your prompt. This methodical refinement helps the model understand what you need for consistency.
Using Negative Prompts to Filter Unwanted Results
Negative prompts help remove errors and unwanted details from your images. They tell the AI what not to include, making your images clearer. This is key for avoiding messy details or unwanted elements.
You can use negative prompts to block out blurry textures, wrong colors, or distorted parts. This proactive strategy saves time in editing. By mastering these filters, your work stays polished and professional.
Selecting the Right AI Tools for Your Content
Finding the right platform is key for balancing cost, speed, and quality in your AI workflow. You need a robust tech stack that grows with your content needs. Reliable connections keep your creative process smooth and professional.
Evaluating Generative Image Platforms
When setting up your visual pipeline, look for platforms that deliver high-quality images and easy API access. Models from OpenAI, Hugging Face, and Cohere each bring unique strengths for different styles. Your choice should depend on whether you need fast processing or detailed stylistic control.
“The most powerful creative tool is the one that disappears into the background, allowing your vision to take center stage without technical friction.”
Here’s a comparison of common generative platforms based on their strengths in production:
| Platform | Primary Strength | Best Use Case | Integration Level |
|---|---|---|---|
| OpenAI | High Consistency | Character Models | High |
| Hugging Face | Model Variety | Experimental Art | Advanced |
| Cohere | Text Processing | Scripting/Prompts | Moderate |
Integrating AI Voice Synthesis and Audio Tools
Visuals are just half the story in digital content creation. You need specialized audio tools to match your visuals’ personality. A smooth connection between your image and audio engines enhances the audience’s experience.
Begin by testing voice synthesis models to find the right tone. Consistency is key; once you find a voice that fits your brand, use it for all projects. This builds recognition and trust with your viewers.
Building Your Onboarding Path for AI Integration
You can boost your creative work by setting up a solid onboarding path for new AI tools. Without a clear plan, the fast growth of AI can be too much. A well-structured path helps you go from basic tries to making top-notch assets with ease.
Structuring Your Learning Milestones
To get good at these systems, break your journey into easy steps. Begin with basic prompts to see how AI understands your words. Then, move on to more complex tasks once you’re good with text-to-image results.
Consistency is the key to doing well in this area. By setting clear goals, you can track your progress. This onboarding path lets you build a strong base before diving into advanced tasks.
Developing a Consistent Daily Practice Routine
Using AI every day is more than just a hobby. You need to make time for it, even if it’s just thirty minutes a day. This habit keeps you in the loop with new features and updates.
Keep a digital log of your best prompts and what didn’t work. This onboarding path is your personal guide, saving you time later. Regular practice keeps you sharp and your work flowing smoothly.
Iterative Refinement of AI-Generated Assets
The difference between a hobbyist project and a polished production often lies in how you refine your initial AI generations. While your first prompt might yield a great concept, iterative refinement is the secret ingredient that transforms raw drafts into professional-grade assets.
By dedicating time to post-processing, you ensure that every pixel meets your creative standards. This stage allows you to correct minor errors and push the boundaries of your original composition.
Techniques for Inpainting and Outpainting
Inpainting and outpainting are essential tools for any creator looking to maintain total control over their visual narrative. Inpainting allows you to mask specific areas of an image to regenerate or fix details, such as correcting a distorted hand or adjusting a facial expression.
Conversely, outpainting enables you to expand the canvas beyond its original dimensions. This is particularly useful when you need to change the aspect ratio for different social media platforms or add more context to a scene.

To master these techniques, consider the following workflow tips:
- Start with low-denoising strength when inpainting to keep the surrounding pixels consistent.
- Use outpainting to create wide-angle shots from portrait-oriented generations.
- Always keep a copy of your original render before applying destructive edits.
“Quality is never an accident; it is always the result of high intention, sincere effort, intelligent direction and skillful execution.”
Upscaling Assets for High-Definition Output
Once your composition is finalized, the final hurdle is ensuring your work meets high-definition standards. AI-generated images often start at lower resolutions, which can look pixelated on modern displays.
Upscaling is the process of increasing the resolution of your assets while maintaining sharpness and detail. Using specialized AI upscalers, you can effectively double or quadruple the size of your images without losing quality.
This step is crucial for professional scrutiny, especially if you plan to print your work or display it on large monitors. By integrating these post-processing steps into your routine, you guarantee that your final output remains crisp, clear, and ready for distribution.
Advanced Techniques for Visual and Audio Consistency
Creating a consistent look across many projects is key for experienced creators. It’s not just about making one image; it’s about making sure your audience knows it’s you. Consistency is what holds your creative vision together, no matter where you share it.
Maintaining Style Sheets Across Multiple Projects
To keep your look the same, you need detailed style sheets. These guides tell your AI models what colors, lights, and textures to use. By standardizing your prompts and using the same seed values, your characters will always look the same.
Keep your best prompts in one place. Use them for new projects to keep your look consistent. This saves time and keeps your brand’s look strong.
Synchronizing AI Audio with Visual Animations
Getting AI audio and visuals to match is a technical challenge. The timing between what’s said and what’s seen must be perfect. Use special tools to make sure the lip movements match the audio.
It’s also important to manage how fast things move. Make sure your frame rates are the same when you export. Test small parts first to catch any timing issues before you do the whole thing.
| Technique | Primary Benefit | Difficulty Level |
|---|---|---|
| Style Sheet Management | Visual Brand Identity | Moderate |
| Seed Value Locking | Character Consistency | Easy |
| Audio-Visual Syncing | Viewer Immersion | Advanced |
| Frame Rate Matching | Smooth Playback | Moderate |
Navigating Ethical Considerations and Copyright
As you use generative models in your work, knowing the ethical rules is key. Technology changes fast, and laws can’t keep up. This makes it tricky for digital artists. By being open and following the rules, you keep your work safe and professional.
Understanding Fair Use in AI Content
Fair use is important when using AI. Many think using public data is okay, but laws are still being made. Remember, not all AI outputs are protected by copyright.
To keep your work ethical, follow these tips:
- Transparency: Tell people when AI helped create your work.
- Data Sourcing: Use data that’s been collected ethically or with permission.
- Transformative Value: Add your own creativity to AI work to own it more.
Protecting Your Original Creative Output
To keep your work safe, document everything. Keep records of your work, like prompt logs and edits. This documented history shows your unique touch.
Here’s a table with tips for protecting your work in an AI world:
| Strategy | Action Item | Benefit |
|---|---|---|
| Asset Versioning | Save drafts | Shows human touch |
| Prompt Archiving | Save good prompts | Keeps style consistent |
| License Review | Check platform rules | Stays out of trouble |
Your goal is to innovate while respecting others’ rights. Keep up with laws to protect your brand. Consistency and integrity are crucial for a lasting career in digital arts.
Optimizing Your Workflow for Final Export
Your final export process is key to how your audience sees your work. It’s important to know how to package your media for different digital channels. By using export tips, you keep your creative vision clear from start to finish.
Choosing the Best File Formats for Distribution
Picking the right file format is crucial for keeping your work looking good and working well. For technical documents, like project blueprints, use clean, print-ready PDFs. This format keeps your work organized and easy to share or print.
For visual assets, here are some standard formats to ensure they work everywhere:
- PNG: Great for high-quality images that need transparency.
- MP4 (H.264): The top choice for videos, balancing size and quality well.
- WebP: Perfect for web content, fast to load without losing detail.
Export Tips for Social Media Platforms
Each social media platform has its own needs that can change how your content looks. To get more engagement, adjust your settings to fit these technical needs. Using these export tips helps avoid problems like blurry images or wrong sizes.
Here are some tips for social media:
- Aspect Ratios: Check if your platform likes 9:16 for vertical stories or 1:1 for feed posts.
- Bitrate Settings: Keep a steady bitrate to stop platforms from making your videos too small.
- Frame Rates: Use 30fps or 60fps for smooth videos on mobiles.
Standardizing your output helps create a consistent brand identity that your followers will love. Always check your final files on a mobile before sharing to make sure they look great.
Troubleshooting Common AI Production Roadblocks
Working with AI can lead to unexpected technical problems. Even experts face these issues with advanced models. Knowing these problems helps you keep your project moving.
“The measure of a true creator is not the absence of technical errors, but the persistence to resolve them and keep moving forward.”
Resolving Artifacts and Glitches in Renders
Visual problems like distorted textures or unnatural colors can happen. These issues often come from complex prompts or not enough sampling. Adjusting your seed value can quickly fix these problems.
If the problem doesn’t go away, try lowering the weight of certain words in your prompt. Using inpainting tools to fix specific parts of your image is also helpful. This method is faster than starting over.
Managing GPU Memory and Processing Time
Rendering high-quality images uses a lot of computer power. Keep an eye on your VRAM to avoid memory errors. Reducing your batch size helps prevent system crashes.
To speed up processing, pick the right resolution for your computer. If your GPU is struggling, render at a lower resolution first. Then, use an AI upscaler to improve the image quality. This way, your project stays smooth and looks great.
Conclusion
You now have a complete guide for navigating the AI production lifecycle. This journey starts with your text prompts and ends with the final high-definition export of your digital assets.
Building a professional workflow takes patience and attention to detail. You have the tools to keep your projects visually and audibly consistent. Use these methods to improve your output and raise your creative standards.
Technology in this field is always changing. Stay curious and keep trying out new features. Platforms like Midjourney or ElevenLabs are always updating. Your dedication to learning will make your work stand out in a crowded digital world.
Apply these production principles to your next creative project today. Explore the limits of your imagination and see what unique content you can create. Your journey to mastering AI-assisted production begins with the next prompt you write.
FAQ
How can I effectively begin my journey with the tutorial series?
To start, follow a clear onboarding path. First, define your creative goals. This is like using the Agent Architect tool to pick your outcomes. Setting your goals early keeps your tutorial series focused and quality high from the start.
What hardware and software are necessary for running generative AI models?
You’ll need a top-notch NVIDIA GPU with lots of VRAM for complex rendering. Also, make sure you have the latest drivers and a stable setup for tools like Stable Diffusion or Hugging Face. This avoids tech issues in your workflow.
How do I maintain character consistency across different AI-generated images?
To keep characters consistent, you need advanced prompt engineering and testing. Use tools like Dataiku’s Prompt Studio to refine your inputs. Use negative prompts to remove unwanted details, keeping your subject’s look the same.
Which platforms are recommended for balancing cost and output quality?
Look for generative image platforms that connect well with OpenAI or Hugging Face. Adding tools like ElevenLabs for voice synthesis helps build a strong, scalable workflow for your creative needs.
What are the most important export tips for sharing content on social media?
For high-quality media, focus on platform-specific needs. Use H.264 or HEVC codecs for videos and PNG for images. This ensures great engagement on Instagram, TikTok, or YouTube.
How can I fix glitches or unwanted artifacts in my AI renders?
Use inpainting and outpainting to fix image areas. For more detail, try Topaz Photo AI to upscale your images. This removes small errors.
How do I manage GPU memory and processing time during complex tasks?
Optimize your workflow by closing unused apps and adjusting batch sizes. If your local hardware is too slow, use cloud services like Google Colab or Lambda Labs. They offer powerful NVIDIA A100 or H100 GPUs.
What is the best way to synchronize AI-generated audio with visual animations?
For perfect sync, use style sheets for visual consistency. Then, tools like Adobe Premiere Pro or DaVinci Resolve can align AI voice synthesis with your animations. This ensures audio and visuals are perfectly in sync.