Lighting Packs Inspired by RGB Studios & Cozy Streams
Ever wondered why your favorite streamers seem to be broadcasting from a fancy studio? It’s not just about fancy cameras or microphones. It’s all about the light you use to create your digital space.
The pokimane ai lighting pack is a great solution for creators. It helps you make your space look professional without needing to know a lot about lighting. With these presets, you can turn any room into a pro space that keeps viewers hooked.
Getting the right tools is key to building a unique look. Whether you want soft, warm lights or bright RGB colors, the pokimane ai lighting pack has what you need. It’s time to stop messing with your settings and create a captivating atmosphere that shows off your personality.
Key Takeaways
- Professional lighting is essential for building a high-quality visual brand.
- The right presets can simplify the process of achieving a cozy stream aesthetic.
- Consistency in your lighting setup helps viewers recognize your unique style.
- Technical quality and creative design work together to improve audience retention.
- Modern tools allow you to achieve studio-grade results from your home office.
Understanding the Aesthetic of Cozy and RGB Streaming
Lighting is key to making your stream engaging. It does more than just show you; it sets the mood for your viewers. Learning to use light well can make your streaming setup stand out.
Defining the Cozy Stream Atmosphere
A cozy stream feels warm and inviting. It’s like natural light, which keeps your video clear and shadow-free. Warm lighting makes your space feel cozy, keeping viewers watching longer.
To get this cozy feel, soften your light sources. Soft light is better for your eyes than harsh glare. Here’s why a cozy setup is great:
- Enhanced comfort for both you and your viewers.
- Better skin tones from softer light.
- A vibe that makes people want to join in.
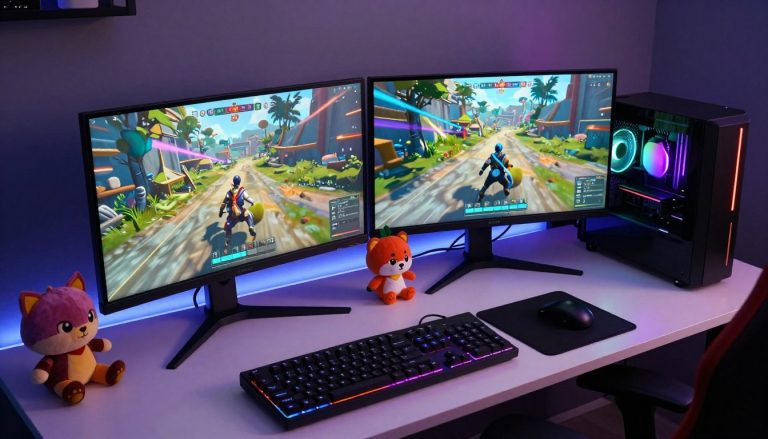
The Role of RGB Lighting in Modern Setups
RGB lighting brings energy to your stream, perfect for gaming or creative work. It lets you add color and depth to your setup. You can highlight parts of your room with bright colors, making your space unique.
Finding the right mix of main light and accent colors is crucial. Too much color can mess with video clarity or distract from your content. But, when done right, it adds a soft glow that connects your screen to the room.
Your streaming setup should show who you are while looking professional. Mix warm, cozy lights with ambient lighting for a setup that draws viewers back.
Essential Gear for Your Lighting Setup
Starting your journey to a professional streaming setup means choosing the right gear. You need a mix of main and secondary lights to keep your face in focus.
Choosing the Right Key Lights
The key light is your main light source. It makes your features stand out and gives a clear image.
LED panels are great for their power and color accuracy. Adding a fill light helps soften shadows on the other side of your face.
Selecting Ambient RGB Strips and Panels
Adding lights that show your brand is key. LED strips can make your background pop with color.
Smart panels are also good for changing your backdrop. They work well with your software, letting you change the mood fast.
Diffusing Light for a Softbox Look
Getting a softbox look is important for flattering light. Diffusion spreads the light, avoiding harsh shadows and skin issues.
Without a softbox, a diffusion cloth or white umbrella works. They turn harsh light into a soft, cinematic glow.
| Gear Type | Primary Function | Best Usage |
|---|---|---|
| Key Light | Main Illumination | Directly in front of creator |
| Fill Light | Shadow Reduction | Side angle to soften contrast |
| LED Strips | Ambient Glow | Background or desk perimeter |
| Diffusion | Light Softening | Over any harsh light source |
Getting Started with the Pokimane AI Lighting Pack
Boost your stream’s look by learning how to use the pokimane ai lighting pack. It’s packed with tools to make your stream look pro and engaging. Just a few steps can automate your setup, letting you focus on your content.

Downloading and Installing Lighting Presets
Start by downloading the lighting presets from the official site. Save them in a folder on your computer for easy reach. Keeping things organized helps manage your setup.
Open your lighting software and go to the import section. Pick the files you downloaded to add the presets. These lighting presets save you time and keep your look consistent.
Configuring Software Integration for Your Lights
Link your lights to your streaming software for full automation. Most lights have plugins for OBS or Streamlabs. Make sure they’re all on the same network to avoid delays.
After connecting, set up your scenes to trigger your lights. This way, your pokimane ai lighting pack works smoothly with your scenes. Smooth transitions are key to great production.
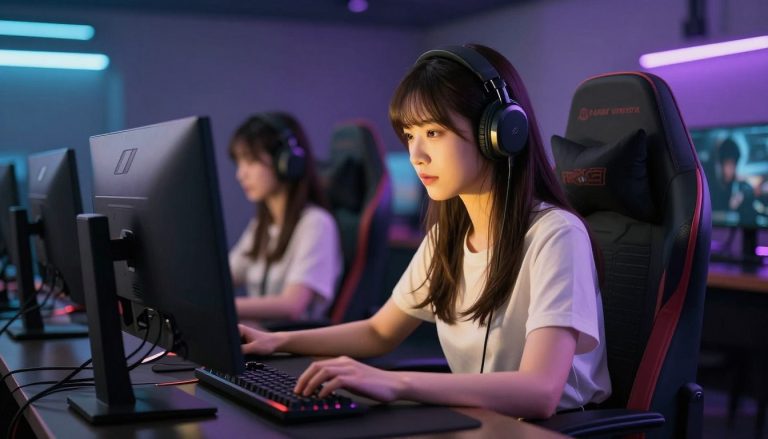
Adjusting Color Temperatures for Different Moods
Adjusting your color temperature sets the mood for your viewers. Warm tones are cozy, while cool tones are modern. Try different settings to match your room’s feel.
Also, control your lighting intensity to avoid overexposure. If your face looks too bright, lower the lighting intensity. Adjusting your color temperature and brightness is a continuous process.
Step-by-Step Guide to Setting Up Your Key Light
Getting your lighting right is key to making any room look like a pro studio. When you set up your streaming setup well, you grab your viewers’ attention. They’ll stay focused on you.
Positioning Your Primary Light Source
The key light is your main light. Place it at a 45-degree angle to your face, a bit above your eyes. This angle makes your features pop without looking flat.
Don’t put the light right in front of you. It makes your face look two-dimensional. Instead, aim for a soft glow that lights up one side of your face. The other side should be a bit shadowed.
Balancing Brightness and Contrast
After setting up your main light, add a fill light to soften shadows on the other side. This light should be much dimmer than the key light. It adds depth to your look.
By balancing these lights, you get a contrasty look that feels like a movie. Play with the light levels to match your content’s mood.
Reducing Glare on Monitors and Glasses
Glare is a big problem for those who wear glasses or sit near their screens. To avoid it, angle your key light higher or move it away from your desk.
If glare still bothers you, try using a diffuser or bouncing the light off a wall. This softens the light, making it easier on your eyes and clearer for your camera.
| Light Type | Placement Angle | Primary Function |
|---|---|---|
| Key Light | 45 Degrees | Main Illumination |
| Fill Light | Opposite Side | Shadow Reduction |
| Backlight | Behind Subject | Depth Creation |
Creating Depth with Background RGB Glow
Background lighting is key to making your stream look top-notch. It adds a three-dimensional space that makes your setup pop. This trick prevents your stream from looking flat and helps you stand out.
Strategic Placement of LED Strips
To get a clean rgb glow, place your led strips along your desk edges or behind your monitor. This creates a soft, diffused color that looks intentional. Make sure not to point the diodes at the camera to avoid harsh hotspots.
Using Smart Bulbs for Accent Lighting
Smart bulbs are great for adding depth to your room. Use them in floor lamps or desk fixtures to create contrast. Adjusting them via a smartphone app lets you change the mood of your stream instantly.
“Lighting is the language of film; it tells the viewer where to look and how to feel about the space they are observing.”
Layering Colors for a Professional Gradient
To create a professional gradient, blend two or more colors across your background. Start with a base color for your led strips, then add a secondary hue in the opposite corner. This layering adds visual interest and sophistication to your rgb glow.
| Lighting Type | Best Use Case | Visual Impact |
|---|---|---|
| LED Strips | Desk Edges | High (Uniform Glow) |
| Smart Bulbs | Corner Lamps | Medium (Accent Depth) |
| Panel Lights | Wall Art | High (Geometric Style) |
Mastering these professional lighting techniques keeps your viewers engaged. Consistent background lighting shows you care about the quality of your broadcast.
Fine-Tuning Your Lighting Presets for Camera Quality
Getting professional video clarity is not just about having the best equipment. It also needs fine-tuning your lighting presets. When your lights match your camera perfectly, your video looks sharp and vibrant. This makes sure your viewers see you as you want them to, no matter the time.

Adjusting White Balance and Exposure
Good images start with how your camera sees light. You need to adjust your color temperature to match your LED panels’ Kelvin rating. If your image seems too orange or blue, your white balance is off.
Exposure is key for top-notch stream quality. Don’t let your camera adjust exposure automatically. This can change brightness too much during movement. Lock your exposure settings to keep skin tones natural and consistent.
“Lighting is the language of film; it tells the viewer where to look and how to feel about the subject on screen.”
Syncing Lighting with Your Stream Software
Today’s streaming setups let you control your environment from your computer. By linking your smart lights with OBS or Streamlabs, you can change lighting presets with a single key press. This keeps your color temperature steady through every scene.
Being consistent is key for a pro creator. When your software controls your hardware, you avoid mistakes during live streams. This integration is crucial for keeping your video clarity high while you chat with your audience.
Testing Your Look Across Different Scenes
Always test your setup in different scenarios before going live. Create a “test” scene in your software to see how your lighting works with various backgrounds and movements. This helps you spot any glare or shadows that could lower your stream quality.
| Scene Type | Color Temperature | Brightness Level | Primary Goal |
|---|---|---|---|
| Cozy Chatting | 3200K (Warm) | 40% | Relaxed Atmosphere |
| High-Energy Gaming | 5600K (Cool) | 80% | Alertness & Focus |
| Creative/Art | 4500K (Neutral) | 60% | Color Accuracy |
Advanced Techniques for a Professional Softbox Look
To make your stream look like a movie, you need to learn how to control light. Moving past simple setups, you see how professional lighting turns a basic broadcast into something special. Getting a softbox look is key for creators who want their viewers to feel like they’re right there.
Utilizing Softbox Modifiers for Flattering Light
Softbox modifiers are the best for a soft, all-around glow. They soften your light, getting rid of harsh lines. Softbox modifiers help you control light exactly where you want it, keeping the rest of the room just right.
Managing Shadows and Highlights
To get a top-notch professional lighting setup, you need to balance shadows and highlights. Add a secondary light or a reflector to fill in dark areas. This creates depth, making your softbox look more interesting.
Also, make sure your face isn’t too bright compared to the room. If it is, your image won’t look cinematic. Adjusting your exposure settings live keeps your image balanced during intense moments.
Creating a Consistent Look for Long Streams
Keeping your stream looking the same for hours is tough. Lock in your settings and keep your background lighting steady. Smart bulbs that match your main light help keep colors consistent.
Stable gear is also crucial. Make sure your light stands are heavy enough not to move. By securing your equipment and setting color profiles, your stream will stay vibrant all night.
Troubleshooting Common Lighting Issues
Even the most skilled streaming setup can face technical problems. These issues can ruin your broadcast. It’s important to solve these problems quickly to keep your stream looking great.
Fixing Flickering and Color Inconsistencies
Flickering often happens when your light and camera don’t match. Adjust your camera to match your area’s power frequency, usually 60Hz in the US. If colors seem off, make sure all your smart bulbs are set to the same color temperature.
Consistency is key for a top-notch stream. If colors change, check your cables for loose connections or interference. Good power adapters can also stop voltage drops that cause flickering in your stream quality.
Managing Heat and Power Consumption
LED lights are efficient, but they can get hot when used for long periods. Make sure your gear has good airflow to avoid overheating. Also, watch your power usage to avoid overloading circuits and dimming your lights.
Lowering your power use saves energy and makes your gear last longer. Use smart plugs to track usage and turn off when not needed. This keeps your studio cool and prevents eye strain during long sessions.
Optimizing Lighting for Low-Light Environments
Working in the dark can make your camera increase ISO, leading to noise and poor stream quality. Place your lights closer to your face to increase lighting intensity without raising ISO. This keeps your image clear and professional.
If shadows are still a problem, use a soft diffuser to spread light evenly. This prevents harsh highlights that can cause eye strain for viewers. Balancing your light with the background creates depth and makes your streaming setup stand out.
| Issue | Primary Cause | Recommended Fix |
|---|---|---|
| Visible Flickering | Shutter Speed Mismatch | Adjust Camera Frequency |
| Color Shifting | Software Sync Error | Reset Preset Profiles |
| Excessive Heat | High Intensity Usage | Improve Airflow/Ventilation |
| Digital Noise | Low Light/High ISO | Increase Light Proximity |
Conclusion
Creating the perfect streaming look is a journey. It mixes technical skills with your own creativity. Now, you have the tools to make your workspace look amazing and grab your audience’s attention.
Being consistent is key to building a strong brand. Work on your lighting until it shows off your unique style. Even small changes in color or light can greatly improve your look.
Try out different moods to find what your viewers like most. Your focus on quality visuals will make you stand out online. Share your new setup on social media to connect with other creators who care about quality.
Keep exploring new ideas for your stream. It should look as good as the content you share. Start making these changes today to see how much better your stream will look.
FAQ
How can I quickly change the mood of my stream between cozy chatting and high-energy gaming?
To quickly change your stream’s mood, use lighting presets in your control software. For a cozy feel, pick warm, amber tones. These tones make your space welcoming.
For high-energy gaming, switch to cool, vibrant colors. These colors add energy and match your game’s intensity. Tools like Lumia Stream or Elgato Control Center make these changes easy with just one click.
What equipment do I need to achieve a professional softbox look for my face?
To get a flattering softbox look, get a high-quality primary light source. The Elgato Key Light or Razer Key Light Chroma are good choices. They have diffusion layers that soften the light, reducing harsh shadows.
Adding a secondary fill light balances the light. This makes your face look polished and professional, like top creators like Pokimane.
How do I install and configure the Pokimane AI lighting pack?
First, download the pack. Then, import the lighting presets into your software. This might involve a technical guide in your lighting system, like Corsair iCUE or Philips Hue.
Once set up, adjust the color temperature and intensity. Make sure it matches your camera and stream content.
My glasses always have a glare from my monitors; how can I fix this?
To reduce glare, position your primary light source wisely. Place it slightly off to the side and higher, angling it down toward your face. This balances your light and keeps your video clear.
It also prevents reflections on your glasses or monitor, making your expressions clear for viewers.
How do I create a sense of depth in a small streaming room?
To add depth, use background lighting and accent colors. Nanoleaf panels or Govee LED strips behind your desk or along room corners create a dynamic glow. This separates you from the background.
Layering these colors into a gradient makes your setup pop on camera. It prevents your video from looking flat.
Why does my lighting look different on camera than it does in person?
This difference is often due to camera settings. Make sure your camera’s white balance and exposure match your lights. This ensures your lighting looks consistent across scenes and sessions.
How can I prevent eye strain during long, 8-hour broadcasts?
To avoid eye strain, don’t stream in a dark room. Use soft ambient lighting and balanced intensity. This makes your streaming space more comfortable for your eyes.
Also, keep your background glow not too bright. This helps maintain a good contrast ratio for your vision over long times.
What should I do if my LED lights are flickering on my stream?
Flickering is often due to a mismatch between light and camera settings. Adjust your camera settings or use high-quality LED panels for video production. Also, manage heat and power to avoid color issues and technical problems that lower your stream quality.